Work Modes
After installation, users can turn on the device and start collecting data after configuration. The device has two modes: configuration and operational mode.
- Configuration Mode: Users can view or configure device parameters such as device name and communication protocol configuration using a USB Type-C cable. The firmware can be updated in this mode.
- Operational Mode: After the device is powered on and the M12 cable is connected, the device is ready to collect data and send it through the communication protocol configured by the user.
3.1 Configuration Mode
There is a circular, waterproof cover at the bottom of the device. The cover needs to be removed by turning it counterclockwise to access the configuration button and USB Type-C connector. Use a USB Type-C cable to connect the device to a computer. After the driver is successfully installed, the user can view the serial port in the device manager. The driver that needs to be installed for the serial port is CP210x.
The RoltekSense Configuration Tool provides a graphical interface for the user to configure the device. Download link:
The example demonstration below is done using SensNode METEO-MB-7. The interface usage is the same for all devices.
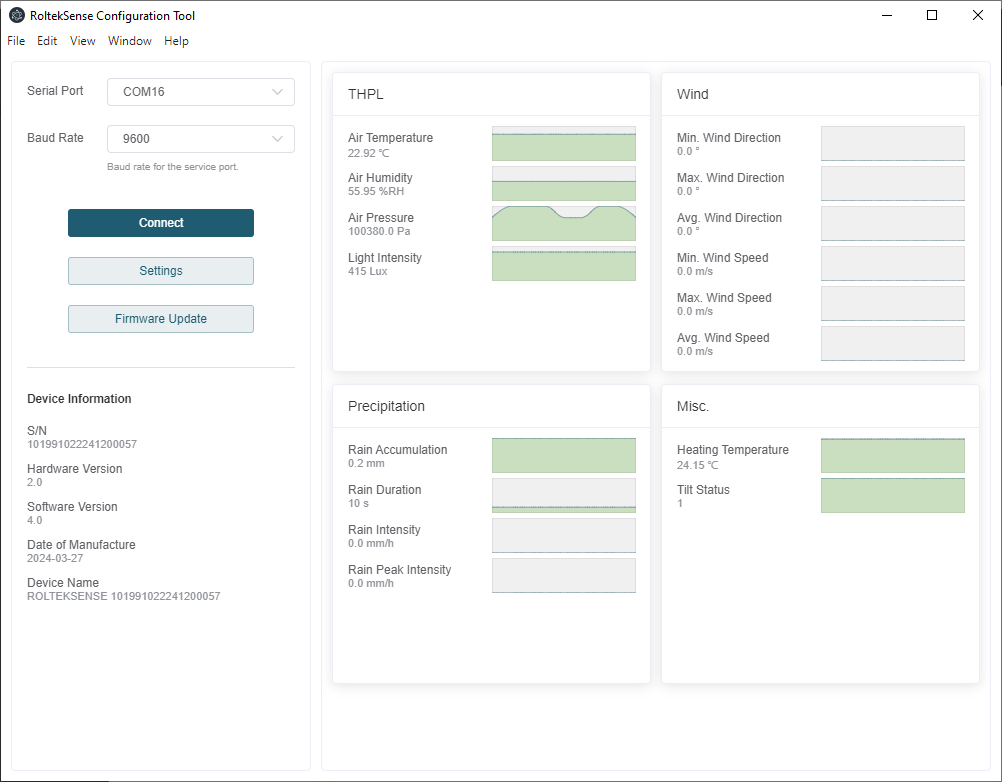
Open the software and select the port connected to your device from the serial port. The default baud rate for communication is 9600. After clicking the Connect button, if the connection is successful, sensor measurements and device information will be retrieved from the device.
Click the Settings button to access device settings and the Read From Device button for additional information.
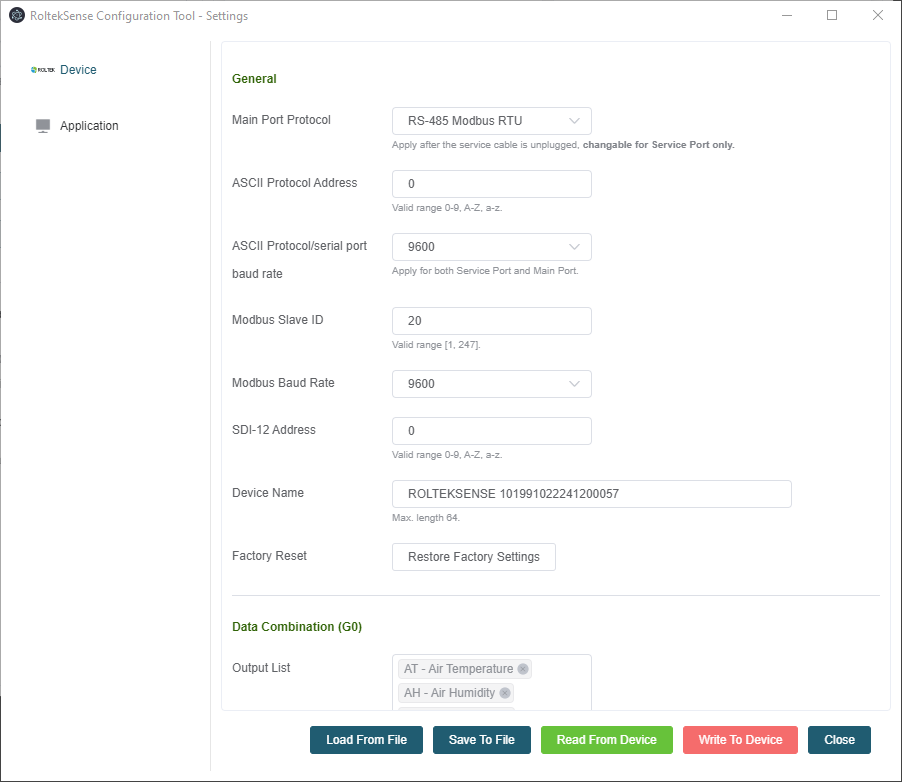
In the general settings, the user can configure communication parameters (e.g., 9600 baud rate and Modbus RTU protocol over RS485 with 20 Slave ID). After this, the user can select which sensor data to read and adjust the data parameters accordingly.
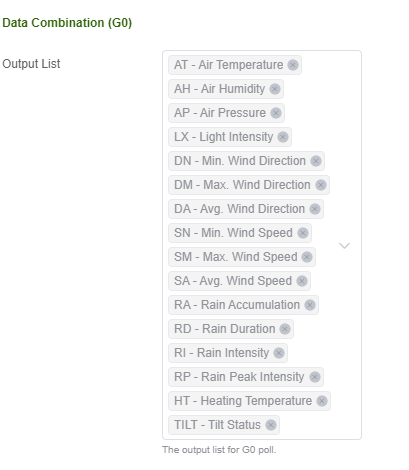
In section G0, the user can select which data to read from the sensors from the dropdown menu.
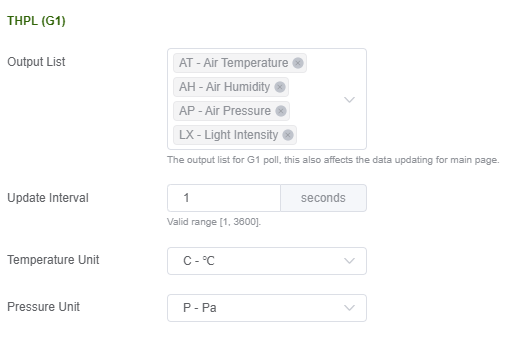
In section G1, the user can configure the Air Temperature, Air Humidity, Air Pressure, and Light Intensity parameters and change the measurement range.
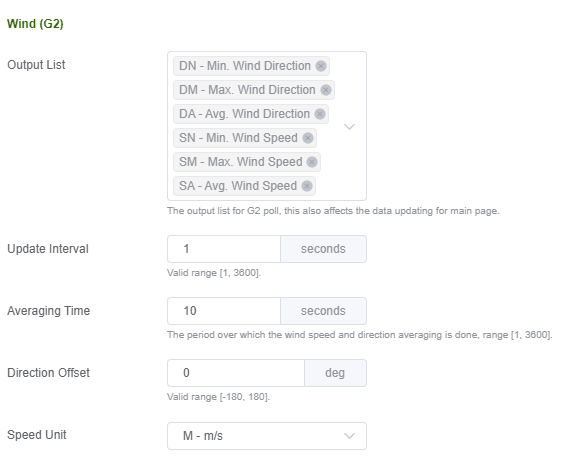
In section G2, the user can configure Wind parameters and change the measurement range.
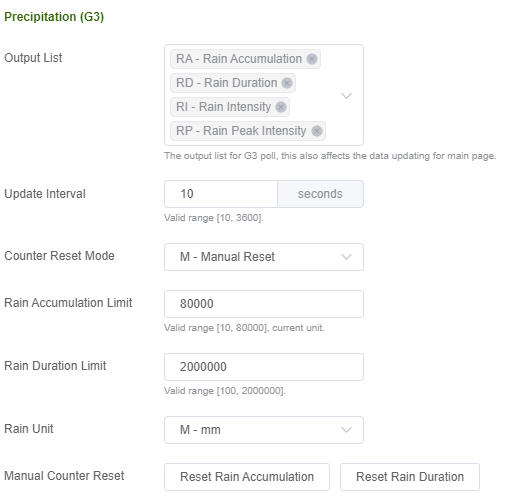
In section G3, the user can configure Rain parameters and change the measurement range.
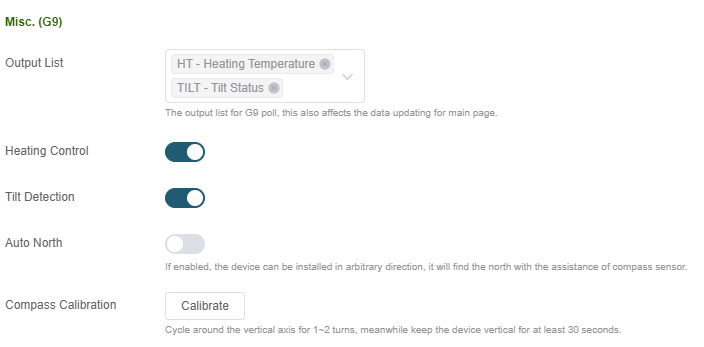
In section G9, the user can configure Heating and Tilt parameters and calibrate the compass.
The data querying range and drawing depth of the homepage can be configured from Settings → Application.
3.2 Operational Mode
After the configuration step, the device is ready to read data via the M12 cable and send data to the master device. For details on the Modbus protocol, you can continue reading in the document's Modbus Protocol section.