Sensor Installation
Do's and Don'ts
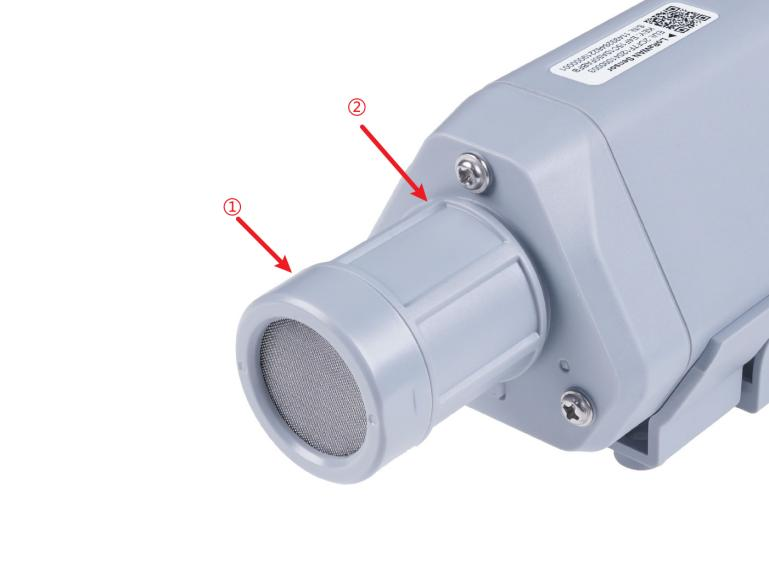
- Do not remove the sensor probe. Otherwise, it may cause leakage and cable breakage. If it is accidentally loosened, it needs to be compressed to ensure waterproof performance. (like ① and ②)
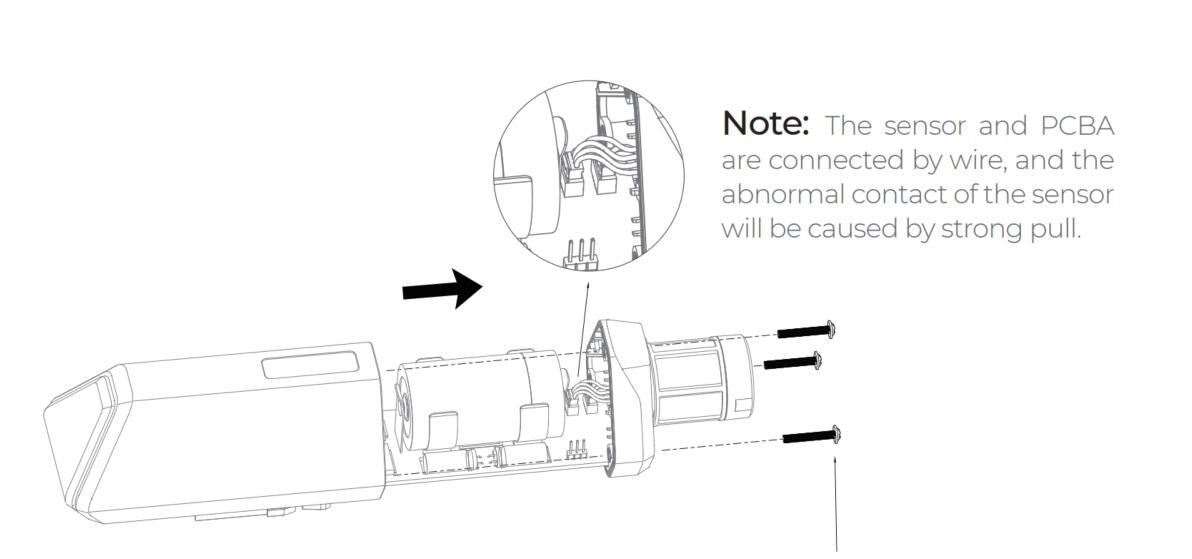
- Do not open the inside of the sensor unless the battery needs to be replaced. This may lead to abnormalities in waterproofing. If opened, ensure that the waterproof seal is properly installed and tighten the screws.
Installing the Sensor Bracket
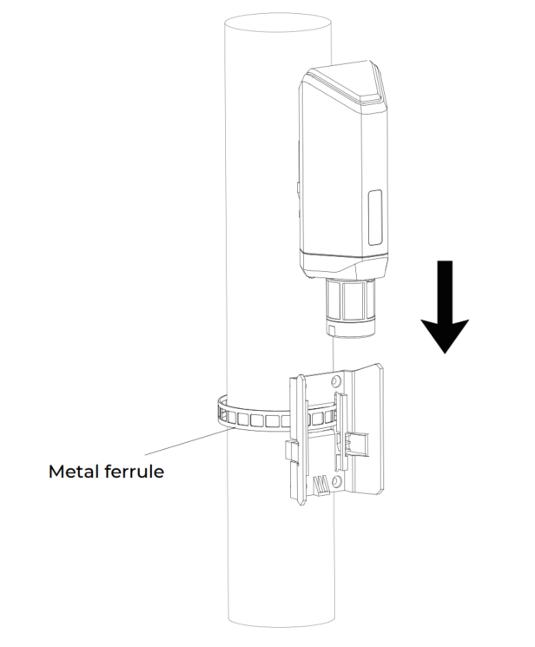
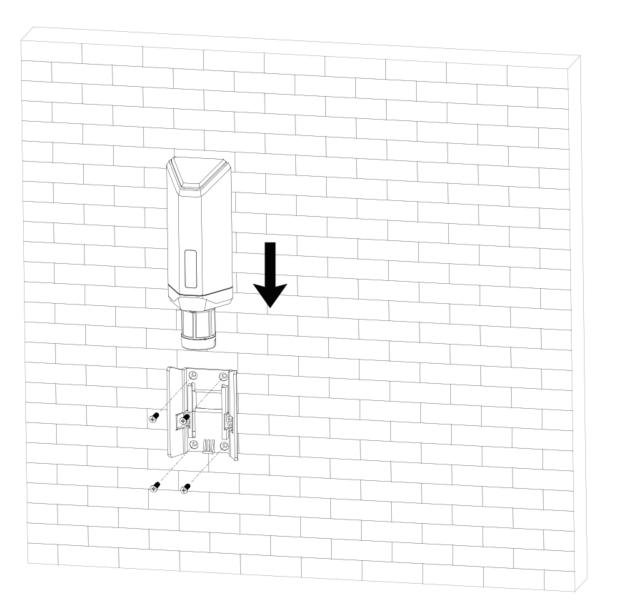
The bracket is a sliding cover. With designated screw holes, the bracket helps securely attach the sensor to a pole or wall.
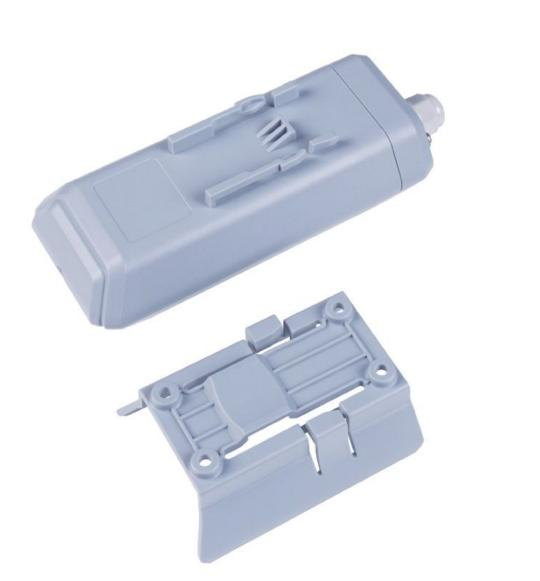
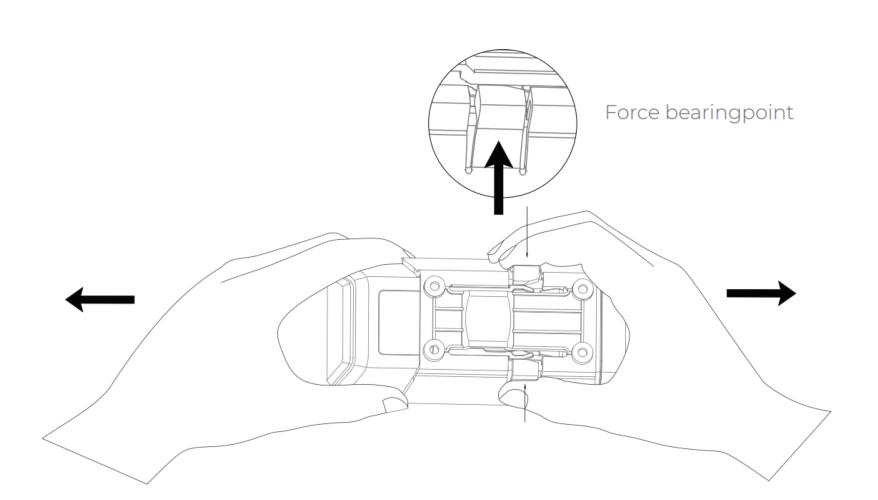
- While holding the sensor in one hand, find an unobstructed direction along the back of the sensor with the bracket in the other hand.
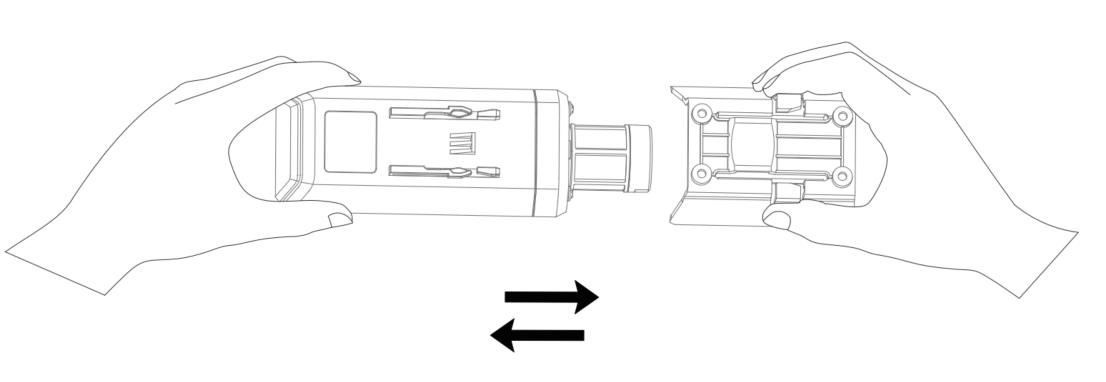
- While holding one hand on the latch, use the other to hold the device. Pull outward by applying force in the opposite direction. Press down on the top of the latch with your finger.
Mounting on Pole and Wall
Mounting on Pole
Mounting on Wall
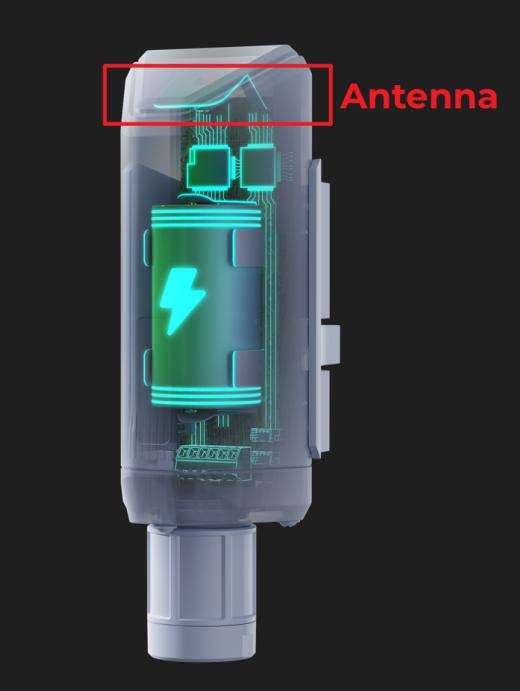
Antenna Installation Direction
When installing, pay attention to the antenna installation direction for better signal strength and longer communication distance between the sensor and gateway.
Aim the antenna towards the gateway and install both the sensor and gateway at higher points to reduce obstacles in the line of sight between them. This will provide stronger signal strength.
Installation Considerations for Sensors
SensNode-LR-STM Installation
Soil sensors should be installed by burying them in the ground, ensuring good contact between the sensor and the soil. The measurement range of the soil probe corresponds to a cube of 7cm x 7cm x 7cm.
- Choose a soil monitoring point and dig a hole with a monitoring depth of 15cm or more.
- Place the probe horizontally or vertically in the soil, being careful to avoid hard rocks.
- Mix the excavated soil with a small amount of clean water, mix thoroughly, and fill the space around the sensor with this mud to ensure full contact between the sensor and the soil.